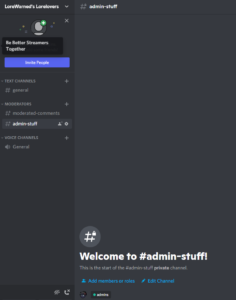
This tutorial will walk you through adding categories & channels in your discord server to help organize it. It will also show you how to permission lock those channels so that you can ensure they are only seen by the people you want to see them. This can be helpful both for administration & moderation, but also for creating spaces to better support your community and audience. For instance, areas for your subs only, etc.
Organizing your server using categories
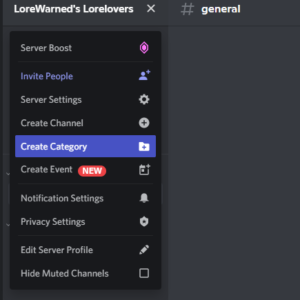
- Go to server settings using the ↓ next to your server name and hit the create category option.
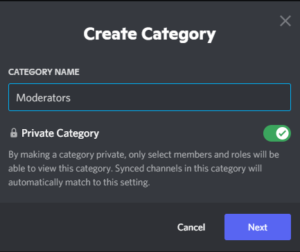
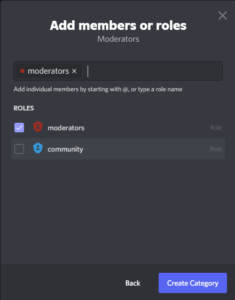
- Name the category & decide if it is private or not and select roles from your relevant options.
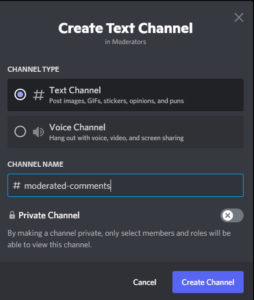
- Drag and drop your category in the order that you want it presented on your server. Then hit the + next to the category to add channels. You can make all channels in a category share the same permission levels but you can also create a channel in the category that has a different privacy level. So, in this example, I have a chat channel in the moderators category that is viewable to moderators and one that is viewable to moderators and admins. I have used the “private channel” option to create the admin stuff channel where I selected the “admin” role. You can see at the start of the channel that it tells you which roles can access the channel.
Tip: Categories & User roles can be a great way for members to self-regulate what they do and do not want to see. For instance, if someone doesn’t care about certain games or doesn’t want to see information on politics or memes, you can create roles for this information. Combined with “react roles” (upcoming tutorial!), this can help your community tag itself!
